|
ShenZhen YouTing Technology Co.,LTD
|
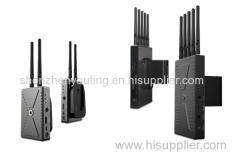
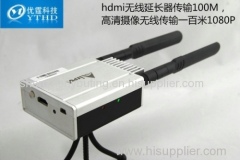
HDMI wireless video transmitter 30M 1.3V Support HD 1080P WHDI 1.0 FCC CE RSS ERP RoHS compliant
| Price: | 149.99~249.99 USD |
| Payment Terms: | T/T,D/P |
| Place of Origin: | Guangdong, China (Mainland) |
|
|
|
| Add to My Favorites | |
| HiSupplier Escrow |
Product Detail
Support 1080P high-definition video resolution
Support WHDI 1.0
With DFS function
Powered by mini-USB port
FCC,CE, RSS,ERP, RoHS compliant
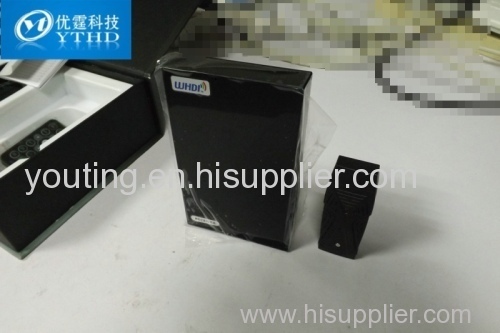
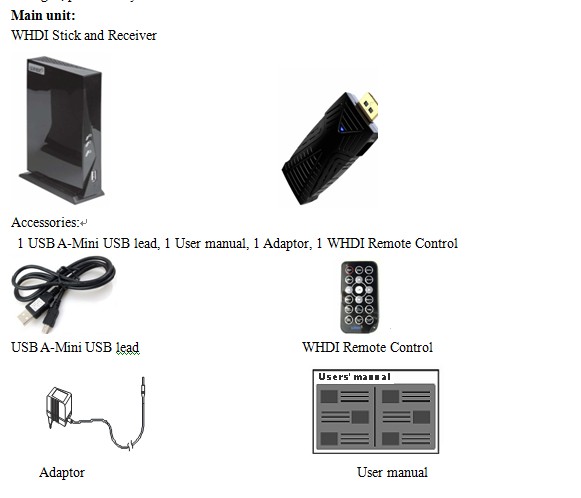
WHDI Stick can be inserted or embedded in PC, Blue-ray player, etc. It is more convenient to use. WHDI Stick can transmit HD video/audio signals to HDMI receiver and reveal all the contents on TV screen. Users can share e-mails, photos, and games with your family or colleagues.
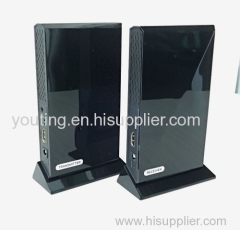
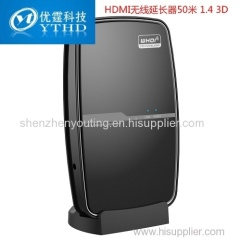
Connect WHDI Stick to your multiple High-Definition devices such as Cable/ Satellite Box, HD Set-Top Box, Blue-Ray DVD Player, Game Console, and Media Center PC hidden in your cabinet behind your seating area; connect TNV-W207R to your HDTV set by HDMI cable, or any display like LCD, PDP or computer monitor with HDMI input interface. It solves the cluttered cables connection problem and let your room clean.
Main features.
-Support 1080P high-definition video resolution;
-Support WHDI 1.0;
-With DFS function;
-Powered by mini-USB port;
-Over 10 meters whole-house range with no latency;
-FCC,CE, RSS,ERP, RoHS compliant;
-Working frequency range: 4.9GHz~ 5.9 GHz ;
-Smart outfit and portable;
-Build in Omni-directional antennas;
-Remote control easily.
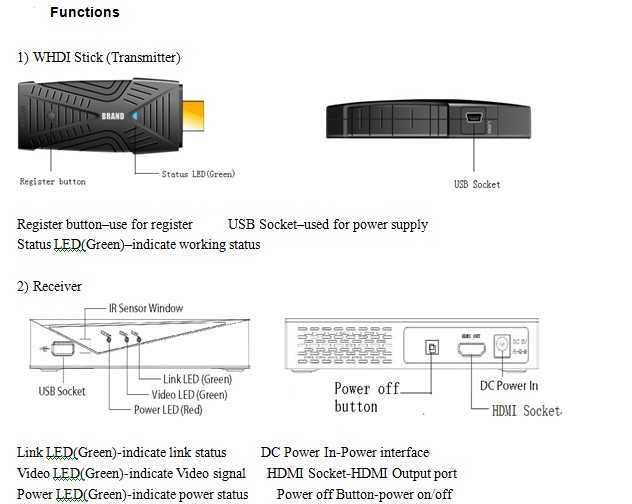
3) LED indications
Operating State | WHDI Stick (Transmitter) | Receiver | ||
Status | Power | Video | Link | |
Powered | ○ | ○ | ○ | |
Add Device | ● | ○ | ○ | ● |
Normal operation | ○ | ○ | ○ | |
PS: ○ Green LED is normally on ● Green LED flashes
PRODUCT SPECIFICATION
Supported Video Resolution | 1080p, 720p, 1080i | |
HDMI Interface | Supports HDMI 1.3 Video Audio format and HDCP 2.0 with video encryption. | |
Transmission Distance | 10 meters line of sight (LOS) | |
Operating Frequencies | 4.9~ 5.9GHz (with DFS function). | |
Antenna | Omni-directional internal antennas. | |
Power Supply | 100~240V AC in,5V/3A DC out Power Adaptor | |
Working Temperature | 0℃~50℃ | |
Dimensions | 71(W)×33.5(D) ×16(H)mm | 146(L)*93(W)*25mm(H) |
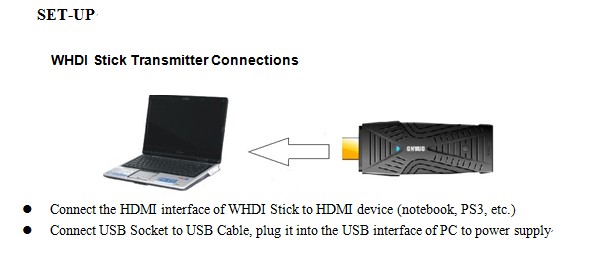
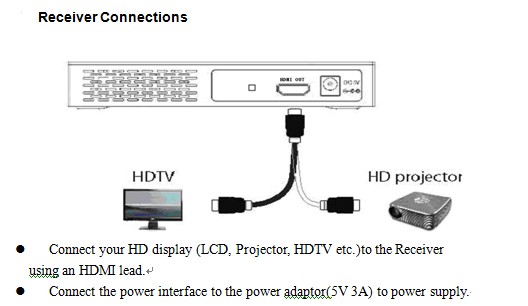
WHDI Remote Control Instructions
Register or Add
1. Connect WHDI Stick (Transmitter)and Receiver to source equipment and display equipment separately.
2. Using WHDI Remote Control at the Receiving end
- Press "Menu" or "Add"; choose "Add video source" in "Setup" interface
3. "Activate registration of video transmitter unit" reveals on the display screen
4. Short press (within 1s) Register button of WHDI Stick, Status LED flickers
5. After searching the Transmitter, the display equipment will reveal confirm information
6. Using WHDI Remote Control to press OK
7. The register state will be revealed on the display equipment
8. After about 30 seconds the register finishes
9. Network will be connected automatically and transmit audio and video signals after registration.
10. No more than 8 transmitters can be added as the above procedures
Delete Transmitters
1. Press "Source" to check the Transmitter
2. Press "Delete" or "Menu" to select "Remove video source"
3. Select the device to be deleted and press "OK"
4. After deleting the device, press "Source" to ensure the device is no more exist
5. Other devices can be also deleted as the above procedures
Modify source equipment name
1. Press "Menu" to select "Modify video source name" on the screen
2. Select the source to be modified and press Up and Down button to modify
3. Press the Right and Left button to select characters to be modified; pay attention the name of the video source should not be blank
4. Press "OK" after finishing modification
Disconnect Network
1. Press "Menu" to select "Disconnect Wireless link"
2. Press "OK" to ensure disconnection
3. Network disconnect when "Wireless off" reveals on the screen
Change Audio/Video interface or video source
1. Press "Source" to ensure at least two video sources exist when the device is normally connected and audio and video transmit fluently
2. Press "Next Source" to change to next video source
3. Press "Pre Source" to change to previous video source
Functions of the buttons on WHDI Remote Control
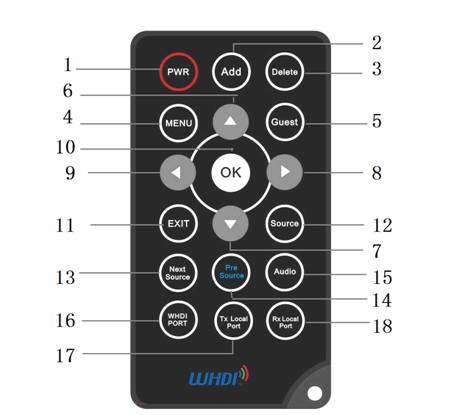
Item | Key | Function |
1 | PWR | Standby key; available to Transmitter and Reveicer |
2 | Add | To add video source to device list; available to Receiver |
3 | Delete | To delete Receiver from device list or delete character of the device name;available to Receiver |
4 | MENU | Menu; available to Receiver |
5 | Guest | Temporary visit key; available to Receiver |
6 | △ | To up; available to Receiver |
7 | ▽ | To down; available to Receiver |
8 | ▽ | To the right; available to Receiver |
9 | ▽ | To the right; available to Receiver |
10 | OK | To confirm; available to Receiver |
11 | Exit | To back/exit; available to Receiver |
12 | Source | To list all the video source; available to Receiver |
13 | Next Source | To select next video source; available to Receiver |
14 | Pre Source | To select previous video source; available to Receiver |
15 | Audio | Not available |
16 | WHDI Port | Not available |
17 | Tx Local Port | Not available |
18 | Rx Local Port | Not available |
Product Software Upgrade
1) Open Bootloader Manager; connect WHDI Stick to PC by USB cable
2) Connect WHDI Stick power adaptor; the device information will be revealed on the software when the device is successfully connected
3) Click [Browse] button in "Update APP Area", then choose the file to be updated; press [UpgradeAPP ], after system upgrade success, there will pop-up a dialog box to inform update is complete.
4) If fail to upgrade or appear related failure information, please check USB cable is connected normally and reupgrade after the power is normal.
5) Use the same method to upgrade MAC; Click [Browse] button in "Update Mac Area", then choose the file to be updated; press [Upgrade MAC], after system upgrade success, there will pop-up a dialog box to inform update is complete.
6) If fail to upgrade or appear related failure information, please check USB cable is connected normally and reupgrade after the power is normal.
PS: The specific installation method and detailed use process of Bootloader Manager, please refer to WHDI Video Transmitter Bootloader Manager Software User Manual. Software and instructions can be downloaded to the product Web site, the site address www.Dfine-whdi.com.
Troubleshooting
Before following the troubleshooting guide below please make sure that
your WHDI Stick, Receiver and attached equipment (HD source and display)are all properly connected switched on and not in Standby Mode.
No Video | 1. Check the status of the Link LEDs, and check if the HD Media player works normally 2. Check the interface and HDMI lead are undamaged and plugged into the correct socket 3. Make sure that signals can be transmitted from WHDI Stick and the HDMI interface is plugged into the correct output socket 4. Make sure that it is the Receiver that is correctly connected to the HDTV display 5. Make sure that the device is working within the supported transmission distance, if beyond the distance, please make them closer and reconnect |
Power LEDs OFF | 1. Make sure the power is connected, and check the power adaptor output 5V/3A DC 2. Make sure the power can work normally |
Receiver Video LED flashes | 1. Make sure audio and video signals can be transmitted from the source successfully 2. Make sure the Receiver is successfully connected to display equipment 3. Make sure that the device is working within the supported transmission distance, if beyond the distance, please make them closer and reconnect |
Receiver video LED abnormal | 1.Make sure audio and video signals can be transmitted from the source successfully; if no problem, there must be something wrong with the LED 2. Check the interface and HDMI lead are undamaged and plugged into the correct socket if no video source 3. Check the HD source is working normally and related input and output are normal |
Bad Picture | 1. Make sure the picture of HD source is normal 2. Check HDMI leads of Receiver, HD source and display are undamaged and connected correctly |
Bad Audio/No Audio | 1. Make sure that the source is outputting supported audio formats 2. Restart the audio source and reconnect the WHDI Stick and source 3. Make sure there is no 5.1~5.9GHz devices within 1250px of the Receiver. |
Other Issues/ nresolved Issues | If any other issue occurs, try restarting the WHDI Stick and Receiver to reestablish a connection. |

